Getting Started
Note: Starting with GWT 2.11.0 the webAppCreator is deprecated, please see the new instructions.
- Prerequisites
- Download and Install GWT
- Create your first web application
- Run locally in development mode
- Make a few changes
- Compile and run in production mode
- Set up an IDE
Prerequisites
- You will need the Java SDK version 1.8 or later. If necessary, download and install the Java SE Development Kit (JDK) from Oracle or from Adopt OpenJDK for your platform.
- Apache Ant is also necessary to run command line arguments in this sample. If you don't already have it, install Apache Ant.
If you have problems running Ant on the Mac, try setting the $JDK_HOME environment variable with export JDK_HOME="/Library/Java/Home"
Download and Install the GWT SDK

|
Download and unzip the GWT SDK. This contains the core libraries, compiler, and development server that you need to write web applications. See FAQ for system and browser requirements. |
On Windows, extract the files from the compressed folder gwt-2.10.0.zip. On Mac or Linux, you can unpack the package with a command like:
unzip gwt-2.10.0.zip
The GWT SDK doesn't have an installer application. All the files you need to run and use the SDK are located in the extracted directory.
Create your first web application
GWT ships with a command line utility called webAppCreator that automatically generates all the files you'll need in order to start a GWT project. It also generates Eclipse project files and launch config files for easy debugging in GWT's development mode.
You can create a new demo application in a new MyWebApp directory by running webAppCreator:
- Windows
cd gwt-2.10.0

webAppCreator -out MyWebApp com.mycompany.mywebapp.MyWebApp
- Mac or Linux - you may need to make the script executable:
cd gwt-2.10.0

chmod u+x webAppCreator

./webAppCreator -out MyWebApp com.mycompany.mywebapp.MyWebApp
The webAppCreator script will generate a number of files in
MyWebApp/, including some basic "Hello, world"
functionality in the class
MyWebApp/src/com/mycompany/mywebapp/client/MyWebApp.java. The
script also generates an Ant build script MyWebApp/build.xml.
Run locally in development mode
To run your newly created application in development mode:
cd MyWebApp/

ant devmode
This command starts GWT's development mode server, a local server used for development and debugging, as follows:
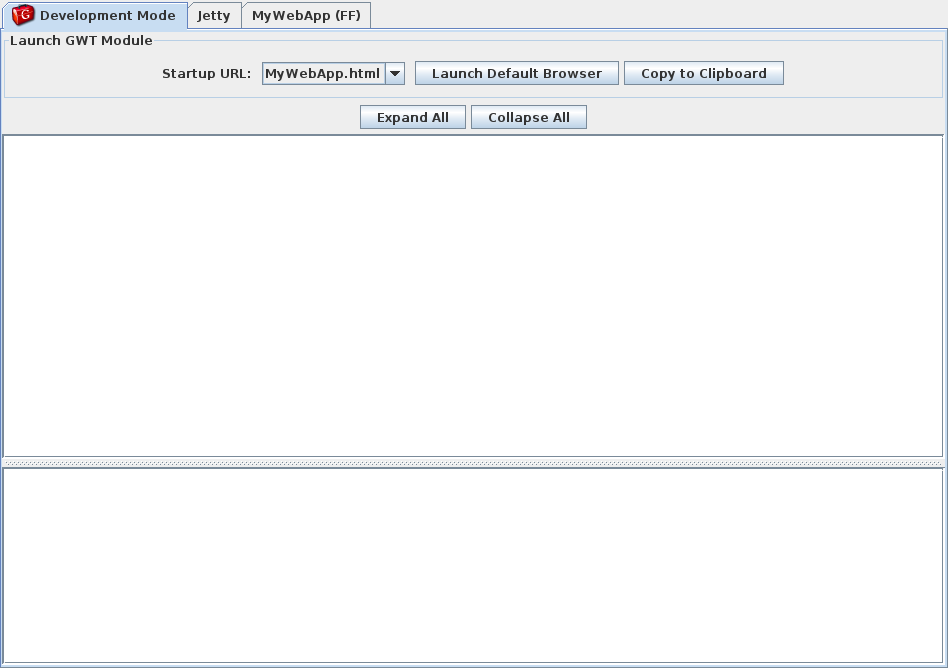
Launch the local server in a browser by either 1) clicking "Launch Default Browser" or 2) clicking "Copy to Clipboard" (to copy its URL), then pasting into Firefox, Internet Explorer, Chrome, or Safari.
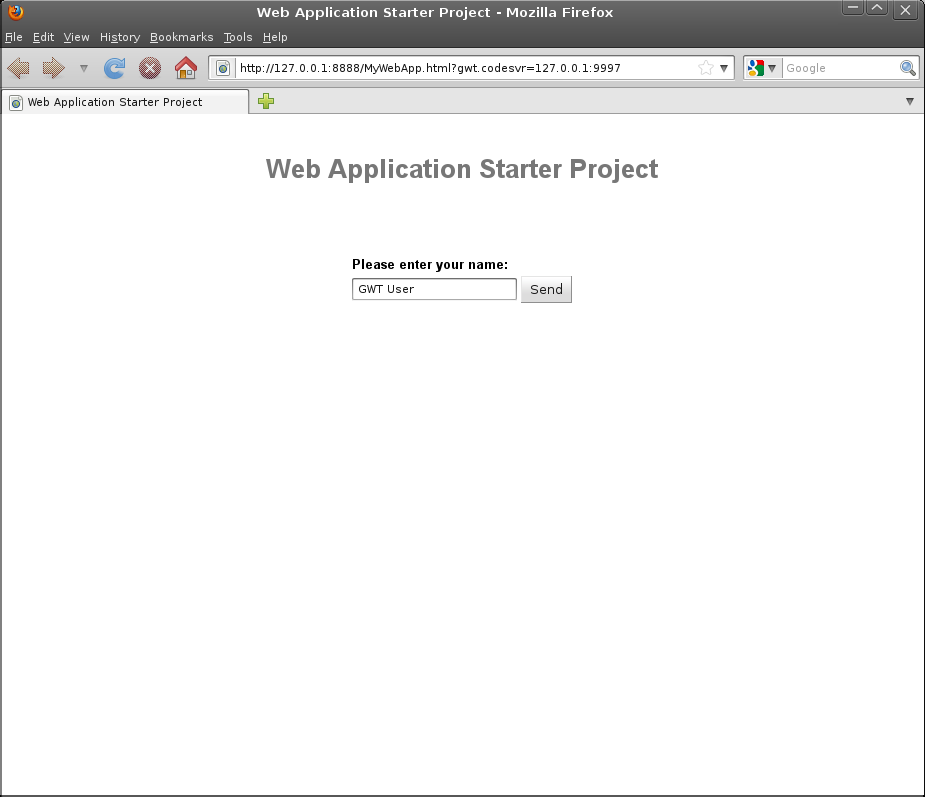
The starter application will load in Super Dev Mode as follows:
Make a few changes
The source code for the starter application is in the
MyWebApp/src/ subdirectory, where MyWebApp is the name you gave to
the project above. You'll see two packages,
com.mycompany.mywebapp.client and
com.mycompany.mywebapp.server. Inside the client package is code that will eventually be compiled to JavaScript and run as client code in the browser. The java files in the server package will be run as Java bytecode on a server, in the case of this Quick Start on the App Engine servers.
Look inside com/mycompany/mywebapp/client/MyWebApp.java. Line 41 constructs the "Send" button.
final Button sendButton = new Button("Send");
Change the text from "Send" to "Send to Server".
final Button sendButton = new Button("Send to Server");
Now, save the file and simply click "Refresh" in your browser to see your change. The button should now say "Send to Server" instead of "Send":
Compile and run in production mode
To run the application as JavaScript in what GWT calls "production mode", compile the application by executing:
ant build
The "build" Ant target invokes the GWT compiler which generates a number of
JavaScript and HTML files from the MyWebApp Java source code in the
MyWebApp/war/ subdirectory. To see the application, open the file
MyWebApp/war/MyWebApp.html in your web browser. The application
should look identical to the development mode above.
Congratulations! You've created your first web application using GWT.
Since you've compiled the project, you're now running pure JavaScript and
HTML that works in IE, Chrome, Firefox, Safari, and Opera. You could now deploy
your application to production by serving the HTML and JavaScript files in your
MyWebApp/war/ directory from your web servers.
Set up an IDE
Now that you've created your first app, you probably want to do something a bit more interesting. But first, if you normally work with an IDE you'll want to set up Eclipse to use the GWT SDK:
If you are going to stick with the command line, check out Speed Tracer and then head over to Build a Sample GWT App.