JUnit Testing
At this point, you've created the initial implementation of the StockWatcher application and it seems pretty stable.
As the code base evolves, how can you ensure that you don't break existing functionality? The solution is unit testing. Creating a battery of good unit test cases is an important part of ensuring the quality of your application over its lifecycle.
To aid you with your testing efforts, GWT provides integration with the open-source JUnit testing framework. You'll be able to create units test that you can run in both development mode and production mode.
In this section, you'll add a JUnit unit test to the StockWatcher project.
- Creating a JUnit test class for StockWatcher and the scripts to run it
- Running unit tests
- Writing a unit test
- Resolving problems identified with unit tests
Note: For a broader guide to JUnit testing, see JUnit Testing.
Before you begin
The StockWatcher project
This tutorial builds on the GWT concepts and the StockWatcher application created in the Build a Sample GWT Application tutorial. If you have not completed the Build a Sample GWT Application tutorial and are familiar with basic GWT concepts, you can import the StockWatcher project as coded to this point.
-
Download the StockWatcher project.
-
Unzip the file.
-
Import the project into Eclipse
- From the
Filemenu, select theImport...menu option. - Select the import source General > Existing Projects into Workspace. Click the
Nextbutton. - For the root directory, browse to and select the StockWatcher directory (from the unzipped file). Click the
Finishbutton.
- From the
If you are using ant, edit the gwt.sdk property in StockWatcher/build.xml to point to where you unzipped GWT.
If you are using ant, replace all references to path_to_the_junit_jar to point to the location of junit on your system.
Note: If you just completed the Build a Sample GWT Application tutorial but did not specify the -junit option with webAppCreator, uncomment the javac.tests, test.dev, test.prod, and test targets in StockWatcher/build.xml and
replace all references to path_to_the_junit_jar to point to the location of junit on your system before continuing.
Creating a JUnit test
When you specified the -junit option, webAppCreator created all the files you need to begin developing JUnit tests. It generates a starter test class, ant targets to run the tests from the command line, and launch configuration files for Eclipse.
Starting with GWT 2.0, the former command-line tool junitCreator has been combined into webAppCreator.
In Eclipse, navigate down to the StockWatcherTest class by expanding the
test/ directory. If you are adding JUnit testing to an existing
application you will need add the test/ directory as a source
folder within you Eclipse project and update your Build Path to include a
reference to an existing JUnit library.
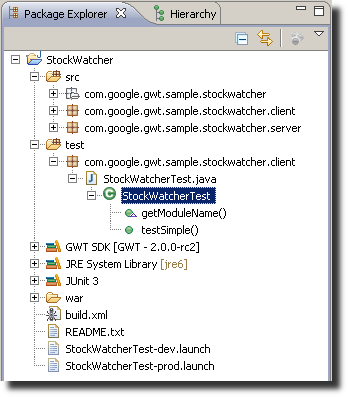
Examining the test class: StockWatcherTest.java
Take a look inside StockWatcherTest.java. This test class was generated in the com.google.gwt.sample.stockwatcher.client package under the StockWatcher/test directory. This is where you will write the unit tests for StockWatcher. Currently it contains a single, simple test: the method testSimple.
- Open the StockWatcherTest.java file.
package com.google.gwt.sample.stockwatcher.client;

import com.google.gwt.junit.client.GWTTestCase;

/**
 * GWT JUnit tests must extend GWTTestCase.
 */
public class StockWatcherTest extends GWTTestCase {                       // (1)

  /**
   * Must refer to a valid module that sources this class.
   */
  public String getModuleName() {                                         // (2)
    return "com.google.gwt.sample.stockwatcher.StockWatcher";
  }

  /**
   * Add as many tests as you like.
   */
  public void testSimple() {                                              // (3)
    assertTrue(true);
  }

}
Notes
(1) Like all GWT JUnit test cases, the StockWatcherTest class extends the GWTTestCase class in the com.google.gwt.junit.client package. You can create additional test cases by extending this class.
(2) The StockWatcherTest class has an abstract method (getModuleName) that must return the name of the GWT module. For StockWatcher, that is com.google.gwt.sample.stockwatcher.StockWatcher.
(3) The StockWatcherTest class is generated with one sample test case—a tautological test, testSimple. This testSimple method uses one of the many assert* functions that it inherits from the JUnit Assert class, which is an ancestor of GWTTestCase. The assertTrue(boolean) function asserts that the boolean argument passed in evaluates to true. If not, the testSimple test will fail when run in JUnit.
Running unit tests
Before you start writing your own unit tests for StockWatcher, make sure the components of the test environment are in place. You can do that by running StockWatcherTest.java which will execute the starter test, testSimple.
You can run JUnit tests four ways:
- from the command line—using the scripts generated by junitCreator
- in Eclipse—using the Google Plugin for Eclipse
- in Eclipse—using the Eclipse launch configuration files generated by webAppCreator
- in manual test mode
From the command line
The build.xml file generated by GWT webAppCreator includes three generated targets used for testing:
- test.dev
- Runs all test classes in development mode.
- test.prod
- Runs all test classes in production mode.
- test
- Runs both test.dev and test.prod
Note: In order to run tests from the command-line, you will need to have JUnit installed on your system.
If you just downloaded the StockWatcher project, you must first open build.xml and replace all references to /path/to/junit-3.8.1.jar
with the path to junit on your system.
- In the command shell, browse to the StockWatcher directory.
- Run the JUnit test in development mode.
- At the command line, enter
ant test.dev
- At the command line, enter
- The test runs as Java bytecode in a JVM.
- The simpleTest executes without error.
[junit] Running com.google.gwt.sample.stockwatcher.client.StockWatcherTest
[junit] Tests run: 1, Failures: 0, Errors: 0, Time elapsed: 15.851 sec
- Run the JUnit test in production mode.
- At the command line, enter
ant test.prod
- At the command line, enter
- The test runs as compiled JavaScript.
- The simpleTest executes without error.
[junit] Running com.google.gwt.sample.stockwatcher.client.StockWatcherTest
[junit] Tests run: 1, Failures: 0, Errors: 0, Time elapsed: 37.042 sec
In Eclipse (using the Google Plugin for Eclipse)
The Google Plugin for Eclipse makes it easy to run tests in Eclipse.
- Run the JUnit test in development mode.
- From Package Explorer, right click on the test case you want to run, select
Run As > GWT Junit Test
- From Package Explorer, right click on the test case you want to run, select
- The simpleTest executes without error.
- Run the JUnit test in production mode.
- From Package Explorer, right click on the test case you want to run, select
Run As > GWT Junit Test (production mode)
- From Package Explorer, right click on the test case you want to run, select
- The simpleTest executes without error.

In Eclipse (using generated launch configurations)
You can run unit tests in Eclipse using the launch configurations generated by webAppCreator for both development mode and production mode.
- Run the JUnit test in development mode.
- From the Eclipse menu bar, select
Run > Run Configurations...
- From the Eclipse menu bar, select
- In the Run window, select
StockWatcherTest-dev - If you are using Mac OSX, add the argument to invoke the Java virtual machine.
- Display the Arguments tab.
- At VM argument, enter
-XstartOnFirstThread -Xmx256M - To save the changes to the Arguments, press
Apply - To run the test, press
Run
- The simpleTest executes without error.
- Run the JUnit test in production mode.
- From the Eclipse menu bar, select
Run > Run Configurations...
- From the Eclipse menu bar, select
- In the Run window, select
StockWatcherTest-prod - If you are using Mac OSX, add the argument to invoke the Java virtual machine.
- Display the Arguments tab.
- At VM argument, enter
-XstartOnFirstThread -Xmx256M - To save the changes to the Arguments, press
Apply - To run the test, press
Run
- The simpleTest executes without error.
In manual test mode
If you want to select the browser on which to run unit tests, use manual test mode.
In manual test mode, the JUnitShell main class runs as usual on a specified GWT module, but instead of running the test immediately, it prints out a URL and waits for a browser to connect. You can manually cut and paste this URL into the browser of your choice, and the unit tests will run in that browser.
**In Depth:** To learn how to run unit tests in manual mode, see the Developer's Guide, [Creating a Test Case](../DevGuideTesting.html#DevGuideJUnitCreation).
Writing a unit test
In a real testing scenario, you would want to verify the behavior of as much of StockWatcher as possible. You could add a number of unit tests to the StockWatcherTest class. You would write each test in the form of a public method.
If you had a large number of test cases, you could organize them by grouping them into different test classes.
However, to learn the process of setting up JUnit tests in GWT, in this tutorial you'll write just one test and run it.
- Write a JUnit test to verify that the constructor of the StockPrice class is correctly setting the new object's instance fields.
- To the StockWatcherTest class, add the testStockPriceCtor method as shown below.
/**
 * Verify that the instance fields in the StockPrice class are set correctly.
 */
public void testStockPriceCtor() {
  String symbol = "XYZ";
  double price = 70.0;
  double change = 2.0;
  double changePercent = 100.0 * change / price;

  StockPrice sp = new StockPrice(symbol, price, change);
  assertNotNull(sp);
  assertEquals(symbol, sp.getSymbol());
  assertEquals(price, sp.getPrice(), 0.001);
  assertEquals(change, sp.getChange(), 0.001);
  assertEquals(changePercent, sp.getChangePercent(), 0.001);
}
- Rerun StockWatcherTest in development mode.
- Both tests should pass.
[junit] Running com.google.gwt.sample.stockwatcher.client.StockWatcherTest
[junit] Tests run: 2, Failures: 0, Errors: 0, Time elapsed: 16.601 sec
Resolving problems identified in unit tests
To see what happens when a unit test fails, you'll reintroduce the arithmetic bug you fixed in the Build a Sample GWT Application tutorial. Originally, the percentage of change was not calculated correctly in the getChangePercent method. To make the unit test fail, you'll break this bit of code again.
- Introduce a bug into StockWatcher.
- In StockPrice.java, make the change highlighted below.
public double getChangePercent() {
  return 10.0 * this.change / this.price;
}
- Run StockWatcherTest in development mode (either in Eclipse of from the command line).
- JUnit identifies the failed test case (testStockPriceCtor). (Output if run in Eclipse.)

- ...and provides a full-stack trace for the exception that resulted—an AssertionFailedError. (Output if run from the command line.)
Testsuite: com.google.gwt.sample.stockwatcher.client.StockWatcherTest
Tests run: 2, Failures: 1, Errors: 0, Time elapsed: 16.443 sec

Testcase: testSimple took 16.238 sec
Testcase: testStockPriceCtor took 0.155 sec
  FAILED
Remote test failed at 172.29.212.75 / Mozilla/5.0 (Windows; U; Windows NT 5.1; en-US; rv:1.9.0.1) Gecko/2008070208 Firefox/3.0.1
 expected=2.857142857142857 actual=0.2857142857142857 delta=0.0010
junit.framework.AssertionFailedError: Remote test failed at 172.29.212.75 / Mozilla/5.0 (Windows; U; Windows NT 5.1; en-US; rv:1.9.0.1) Gecko/2008070208 Firefox/3.0.1
 expected=2.857142857142857 actual=0.2857142857142857 delta=0.0010
  at com.google.gwt.sample.stockwatcher.client.StockWatcherTest.testStockPriceCtor(StockWatcherTest.java:38)
  at com.google.gwt.sample.stockwatcher.client.__StockWatcherTest_unitTestImpl.doRunTest(__StockWatcherTest_unitTestImpl.java:7)
  ...
Note: When running from the command line, complete test reports (including stack traces) will be located in the reports/htmlunit.dev/ directory for development mode
tests and reports/htmlunit.prod/ directory for production mode tests.
3. Correct the error.
4. Rerun the tests.
* Both the JUnit tests should complete successfully again.
[junit] Running com.google.gwt.sample.stockwatcher.client.StockWatcherTest
[junit] Tests run: 2, Failures: 0, Errors: 0, Time elapsed: 16.114 sec
Best Practices: Because there can be subtle differences between the way GWT applications work when compiled to JavaScript and when running as Java bytecode, make sure you run your unit tests in both development and production modes as you develop your application. Be aware, though, that if your test cases fail when running in production mode, you won't get the full stack trace that you see in development mode.
More about testing
At this point, you've created a JUnit test for StockWatcher and added a simple test case to it.
To learn more about all kinds of unit testing in GWT, see the Developer's Guide: