Design
At this point, you've created the stub files you need to start coding StockWatcher.
In this section, you'll review the functional requirements and design the user interface.
Examining the functional requirements
Initially you want the StockWatcher application to do six things.
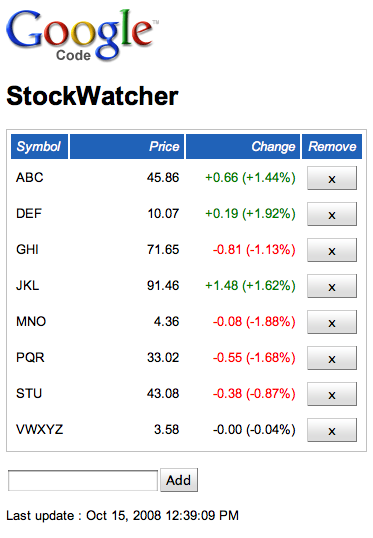
- Provide users with the ability to add stocks. (Supply simple validation on input for illegal characters or existing stock.)
- Display the following information for each stock: symbol, price, change since last refresh.
- Provide users with the ability to delete a stock from the list.
- Refresh the stock price.
- Calculate the change since the last refresh as both a number and a percentage.
- Display a timestamp indicating the last update.
Identifying the elements of the UI design
After studying StockWatcher's functional requirements, you decide you need these UI elements:
- a table to hold the stock data
- two buttons, one to add stocks and one to remove them
- an input box to enter the stock code
- a timestamp to show the time and date of the last refresh
The design team has suggested the following additions:
- a logo
- a header
- colors to indicate whether the change in price was positive or negative
Including Static Elements
GWT does not dictate how you lay out your HTML page. A GWT application can take up the entire browser window, as it does in the startup application, or it can be embedded in an existing page, as it is in the Build a Sample GWT Application page of this tutorial.
The StockWatcher application contains both static and dynamic elements. The Google Code logo and the header "StockWatcher" are static elements in the HTML host page. All the other elements are created programmatically using GWT widgets and panels.
What's Next
At this point you've reviewed StockWatcher's functional requirements. You have a clear idea of what StockWatcher does. You know what UI elements you need to implement and how you want to lay them out.
Now you're ready to build the user interface using GWT widgets and panels.